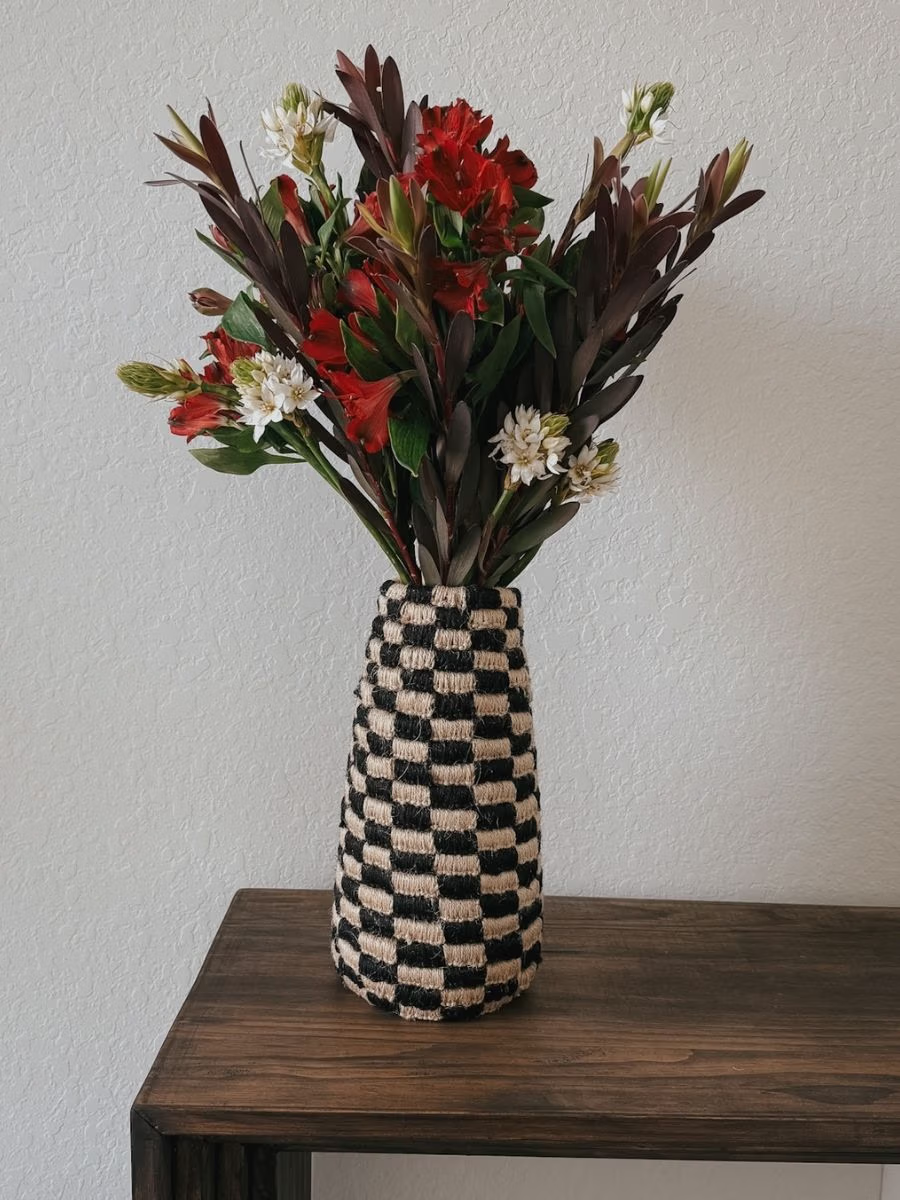
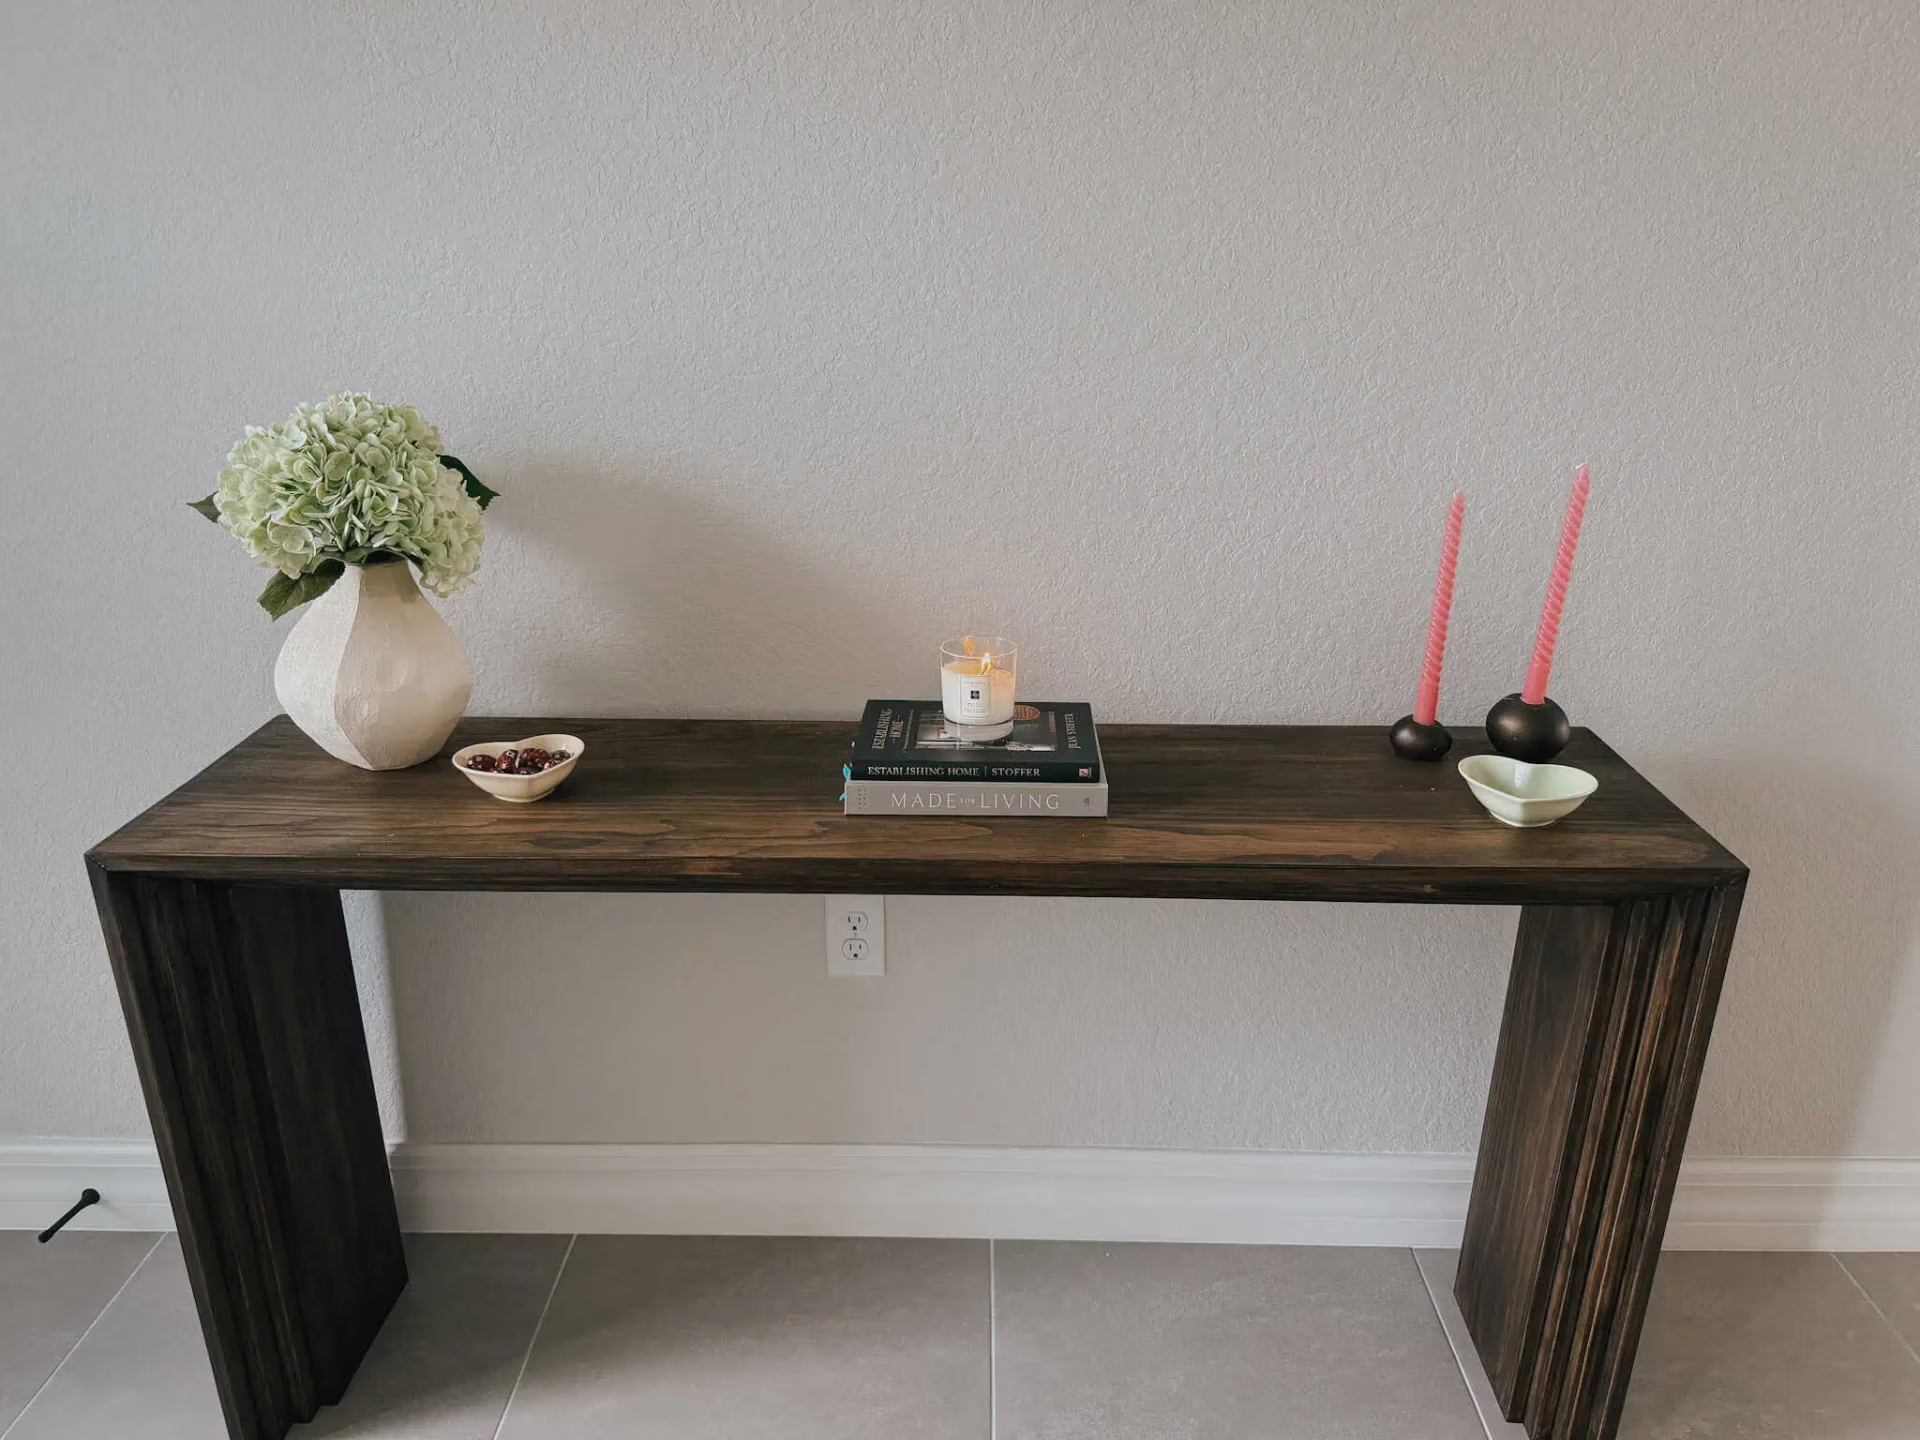
I wanted to bring a little more texture to our console table—but without adding more color. The flowers were always meant to be the focal point here, but I still wanted a vase that felt intentional. Something elevated and unique—not just a vessel that can sometimes fade into the background.

Here’s what I used:
- The vase: This one from Amazon (I liked the shape, the size, and the price—perfect for a DIY like this).
- Hot glue gun: I used the Gorilla Glue Gun. I am loyal to the brand and love that this has high and low temperature settings.
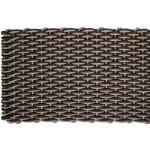
- Jute twine: I went with black and natural, but honestly, this could look amazing in other color pairings too.
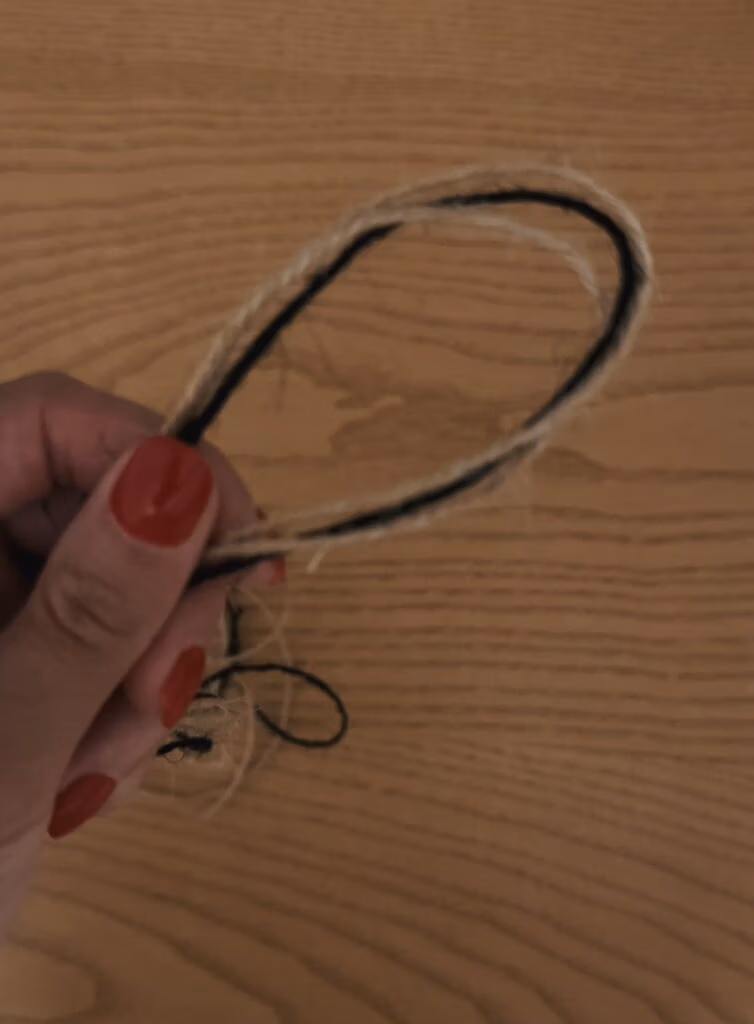
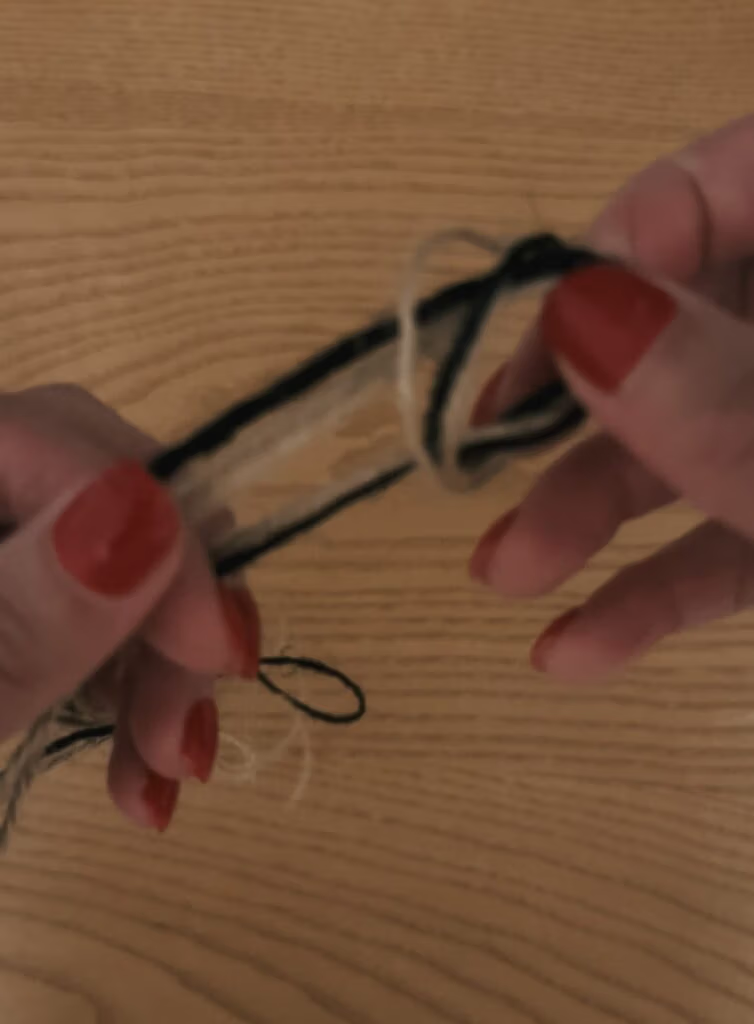
1. Cut your twine
Cut 8 long strands of twine, all the same length. Fold them in half and tie them together with an overhand knot. That gives you 16 working strands and a nice, thick base to start weaving. ( I cut my strands about two yards each. This doesn’t have to be exact but just make sure you cut them long enough to avoid having too many knots)
Tip: You can go wider or narrower by adjusting the number of strands—totally up to you.
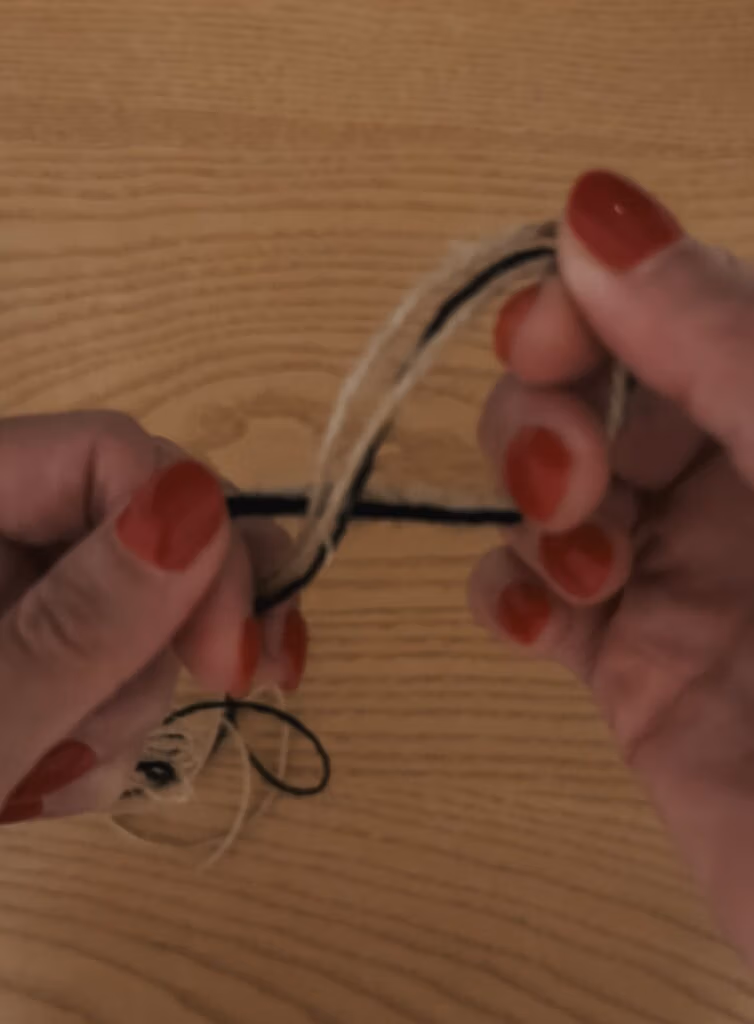
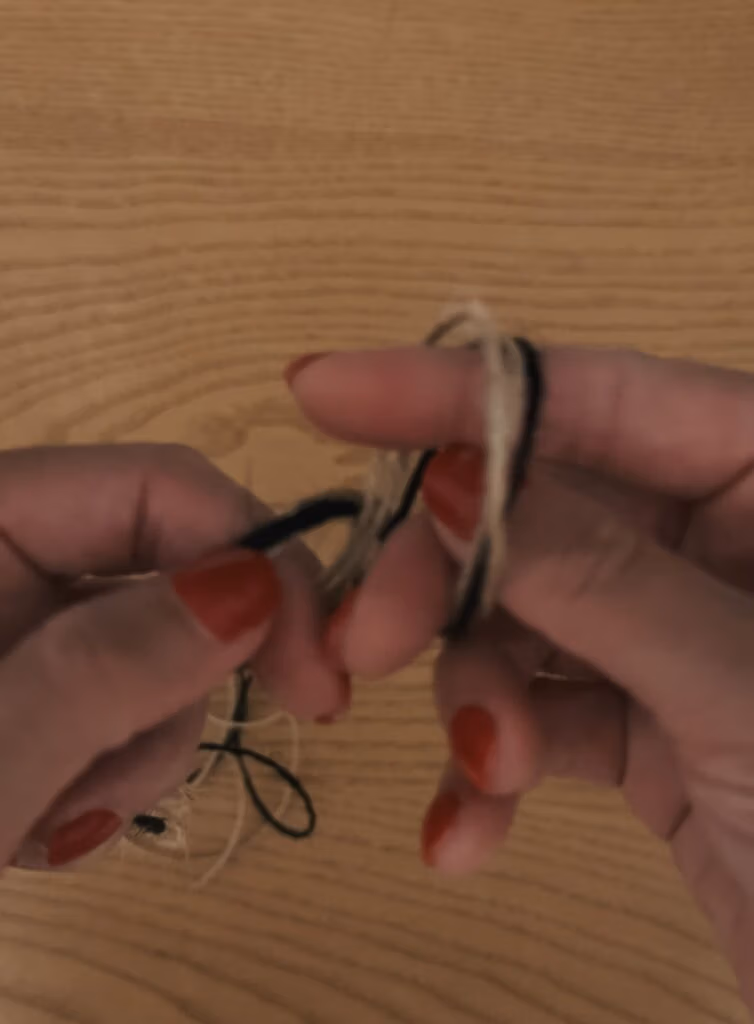

2. Start the checkerboard weave
Using the black and natural twine, I alternated colors every 20 stitches to keep things consistent. I counted out each section so the checks would feel even as I wrapped it around the vase.
Because the vase is tapered, I started with a short weave section first—just enough to wrap the base. That way, I could build the rest of the weave directly on the vase and keep the blocks aligned.

To make the stitch:
- Cross the working string over to form a “4.”
- Loop the tail under the bundle of strings and back through the opening of the “4.”
- Tighten and repeat.
- Alternate sides—make your “4” on the left, then the right—to keep the knots consistent on one side.


3. Glue as you go
Once your first section is long enough, hot glue it around the base of the vase. Then just keep weaving and gluing in sections as you go. This helps everything stay aligned—especially if your vase is curved or tapered.
Tip: Lay the vase on its side and place something heavy inside while you work so it doesn’t roll around.

4. Extend and finish
When you run out of twine, just tie on more, trim the excess, and keep going. The knots blend right into the pattern—super forgiving.